
Explicación detallada de los pasos de configuración básica del transmisor CM442
Este artículo toma como ejemplo el comúnmente usado CM442-3PQ7/0 para detallar los pasos de configuración básica del transmisor CM442, incluyendo cableado, encendido, modificación de idioma, configuración general y configuración de salida de corriente. Es adecuado como referencia para personal técnico de ingeniería y personal de compras.
I. Diagrama de cableado del CM442
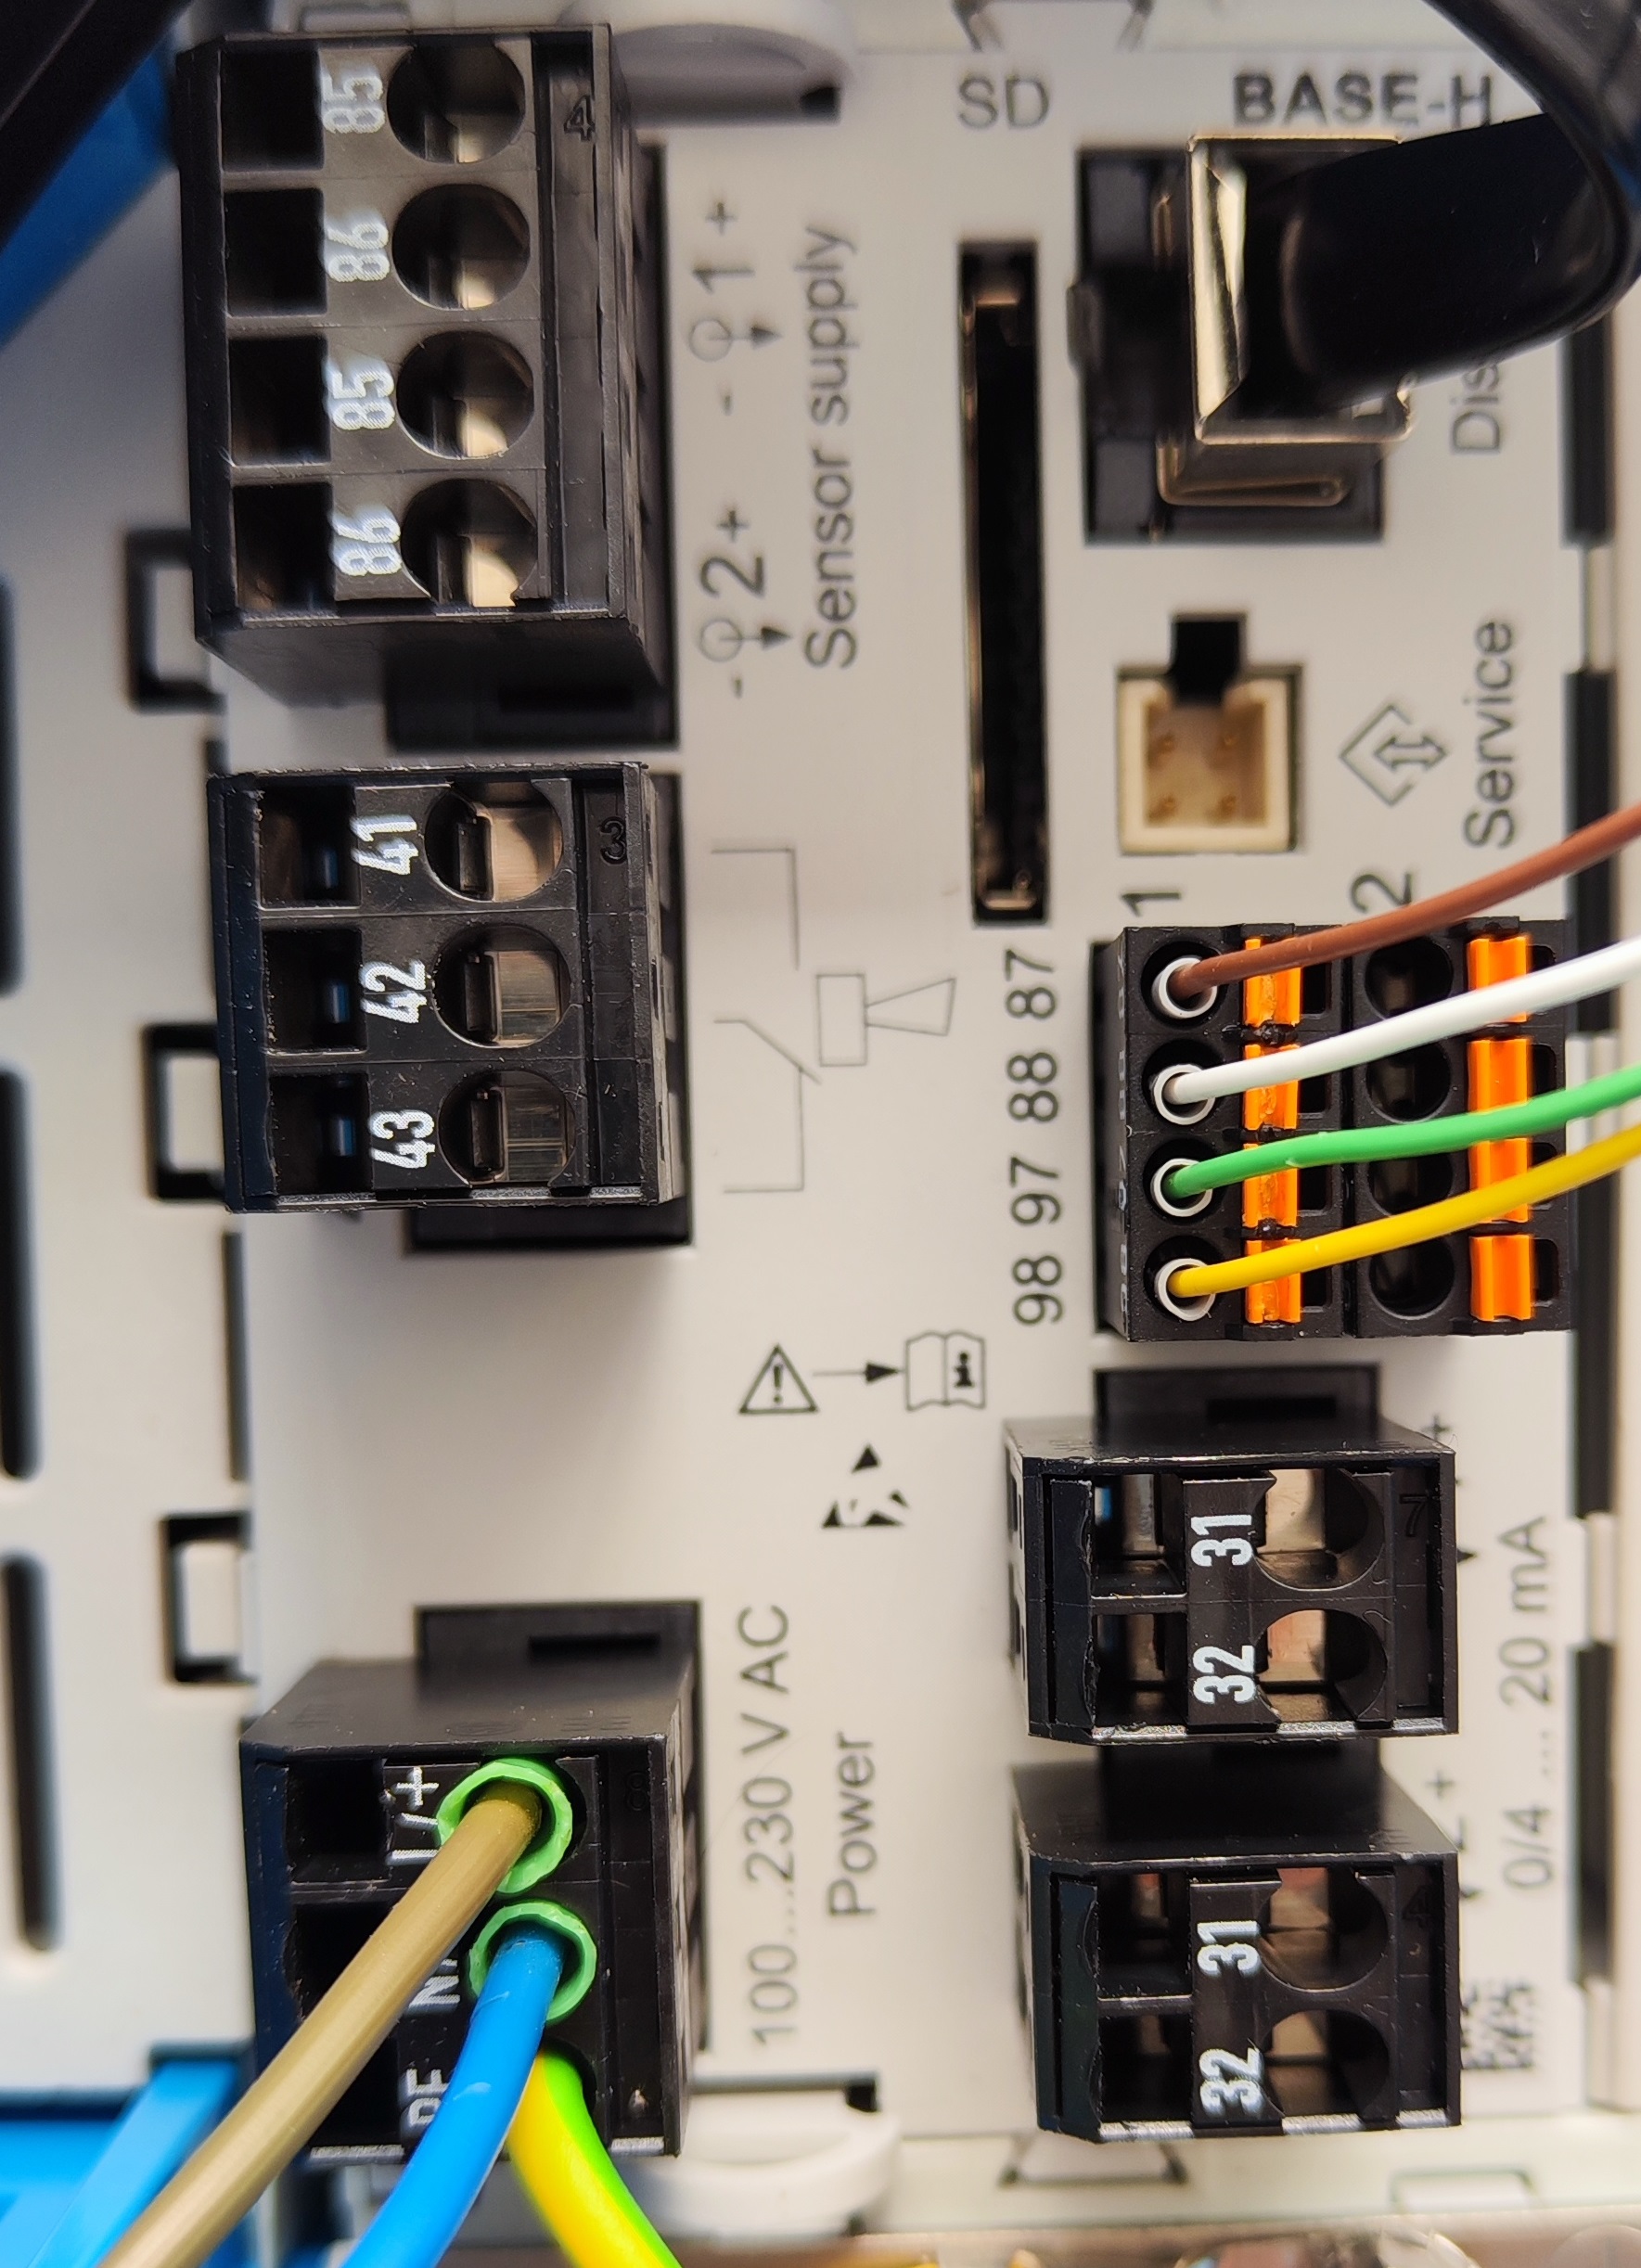
La placa principal del CM442 muestra una alimentación de 220 V AC. En este ejemplo se utiliza un electrodo de vidrio CPS (sensor digital), sin fuente de alimentación adicional, y se emplea un cable de electrodo digital CYK10. La correspondencia de colores del cableado es la siguiente:
- 87: marrón
- 88: blanco
- 97: verde
- 98: amarillo

II. Interfaz de visualización del instrumento tras el encendido
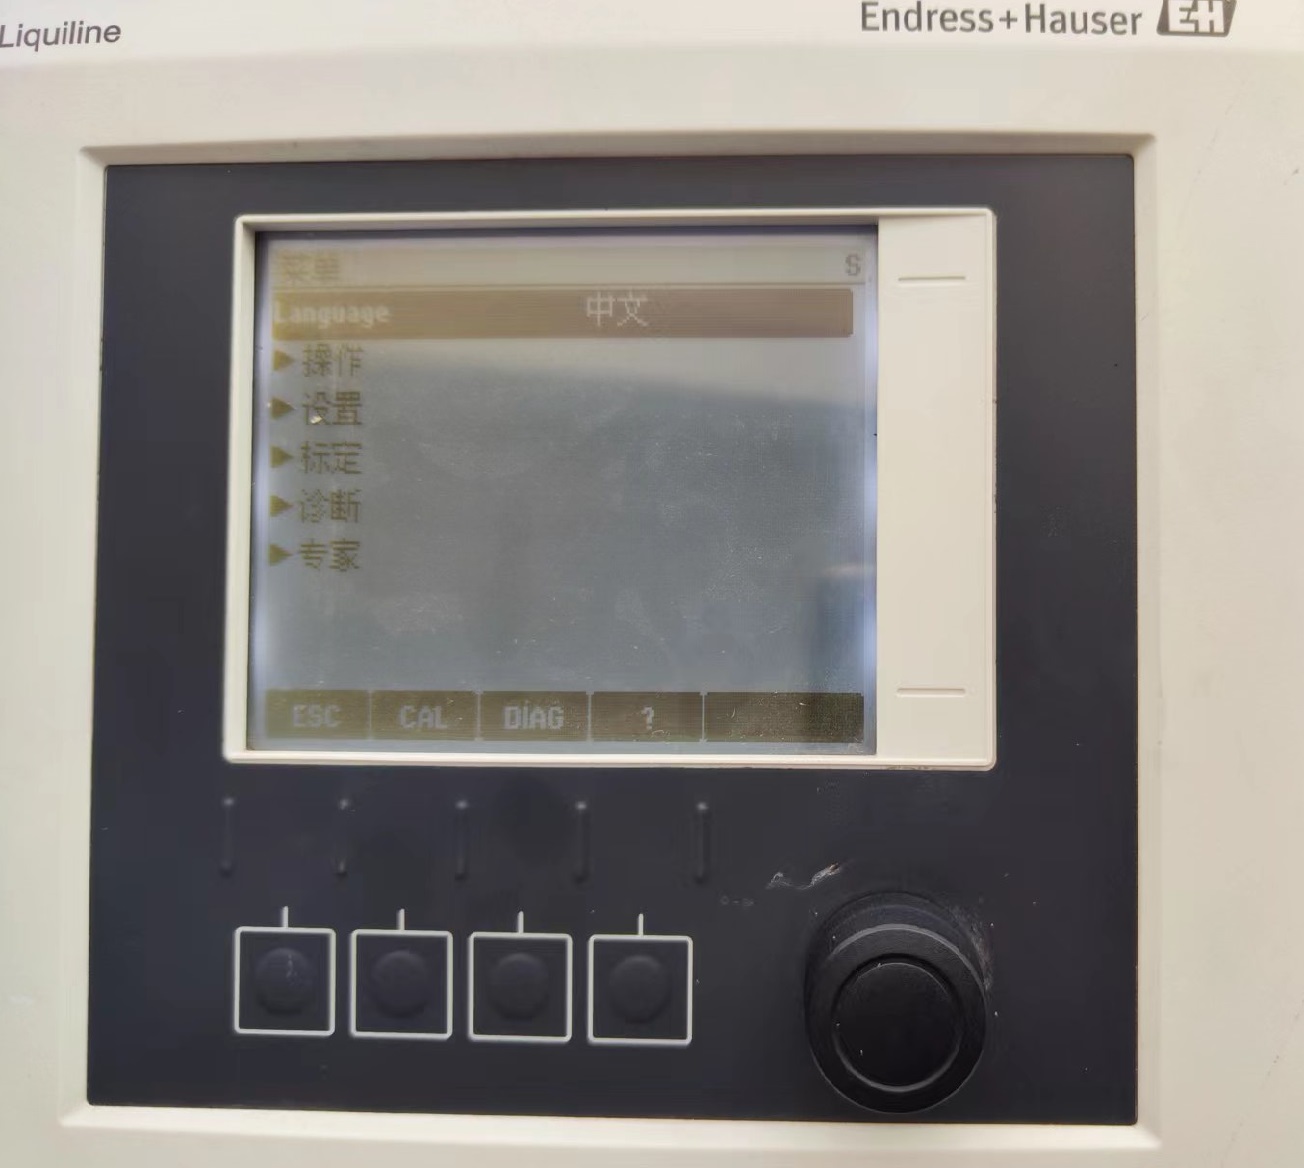
Después del encendido, la interfaz de visualización del instrumento es como se muestra en la figura siguiente. La interfaz incluye 4 teclas y 1 perilla. La perilla se puede ajustar hacia izquierda y derecha; en el centro de la perilla está la tecla de confirmación, y al presionarla se accede al menú del sistema.
III. Modificar el idioma
En el menú, busque la opción Idioma y presione la tecla central de la perilla para modificar el idioma que el usuario necesita visualizar. Por lo tanto, al comprar el CM442, la selección del idioma no es obligatoria, ya que puede ajustarse manualmente más adelante.

IV. Configuración general
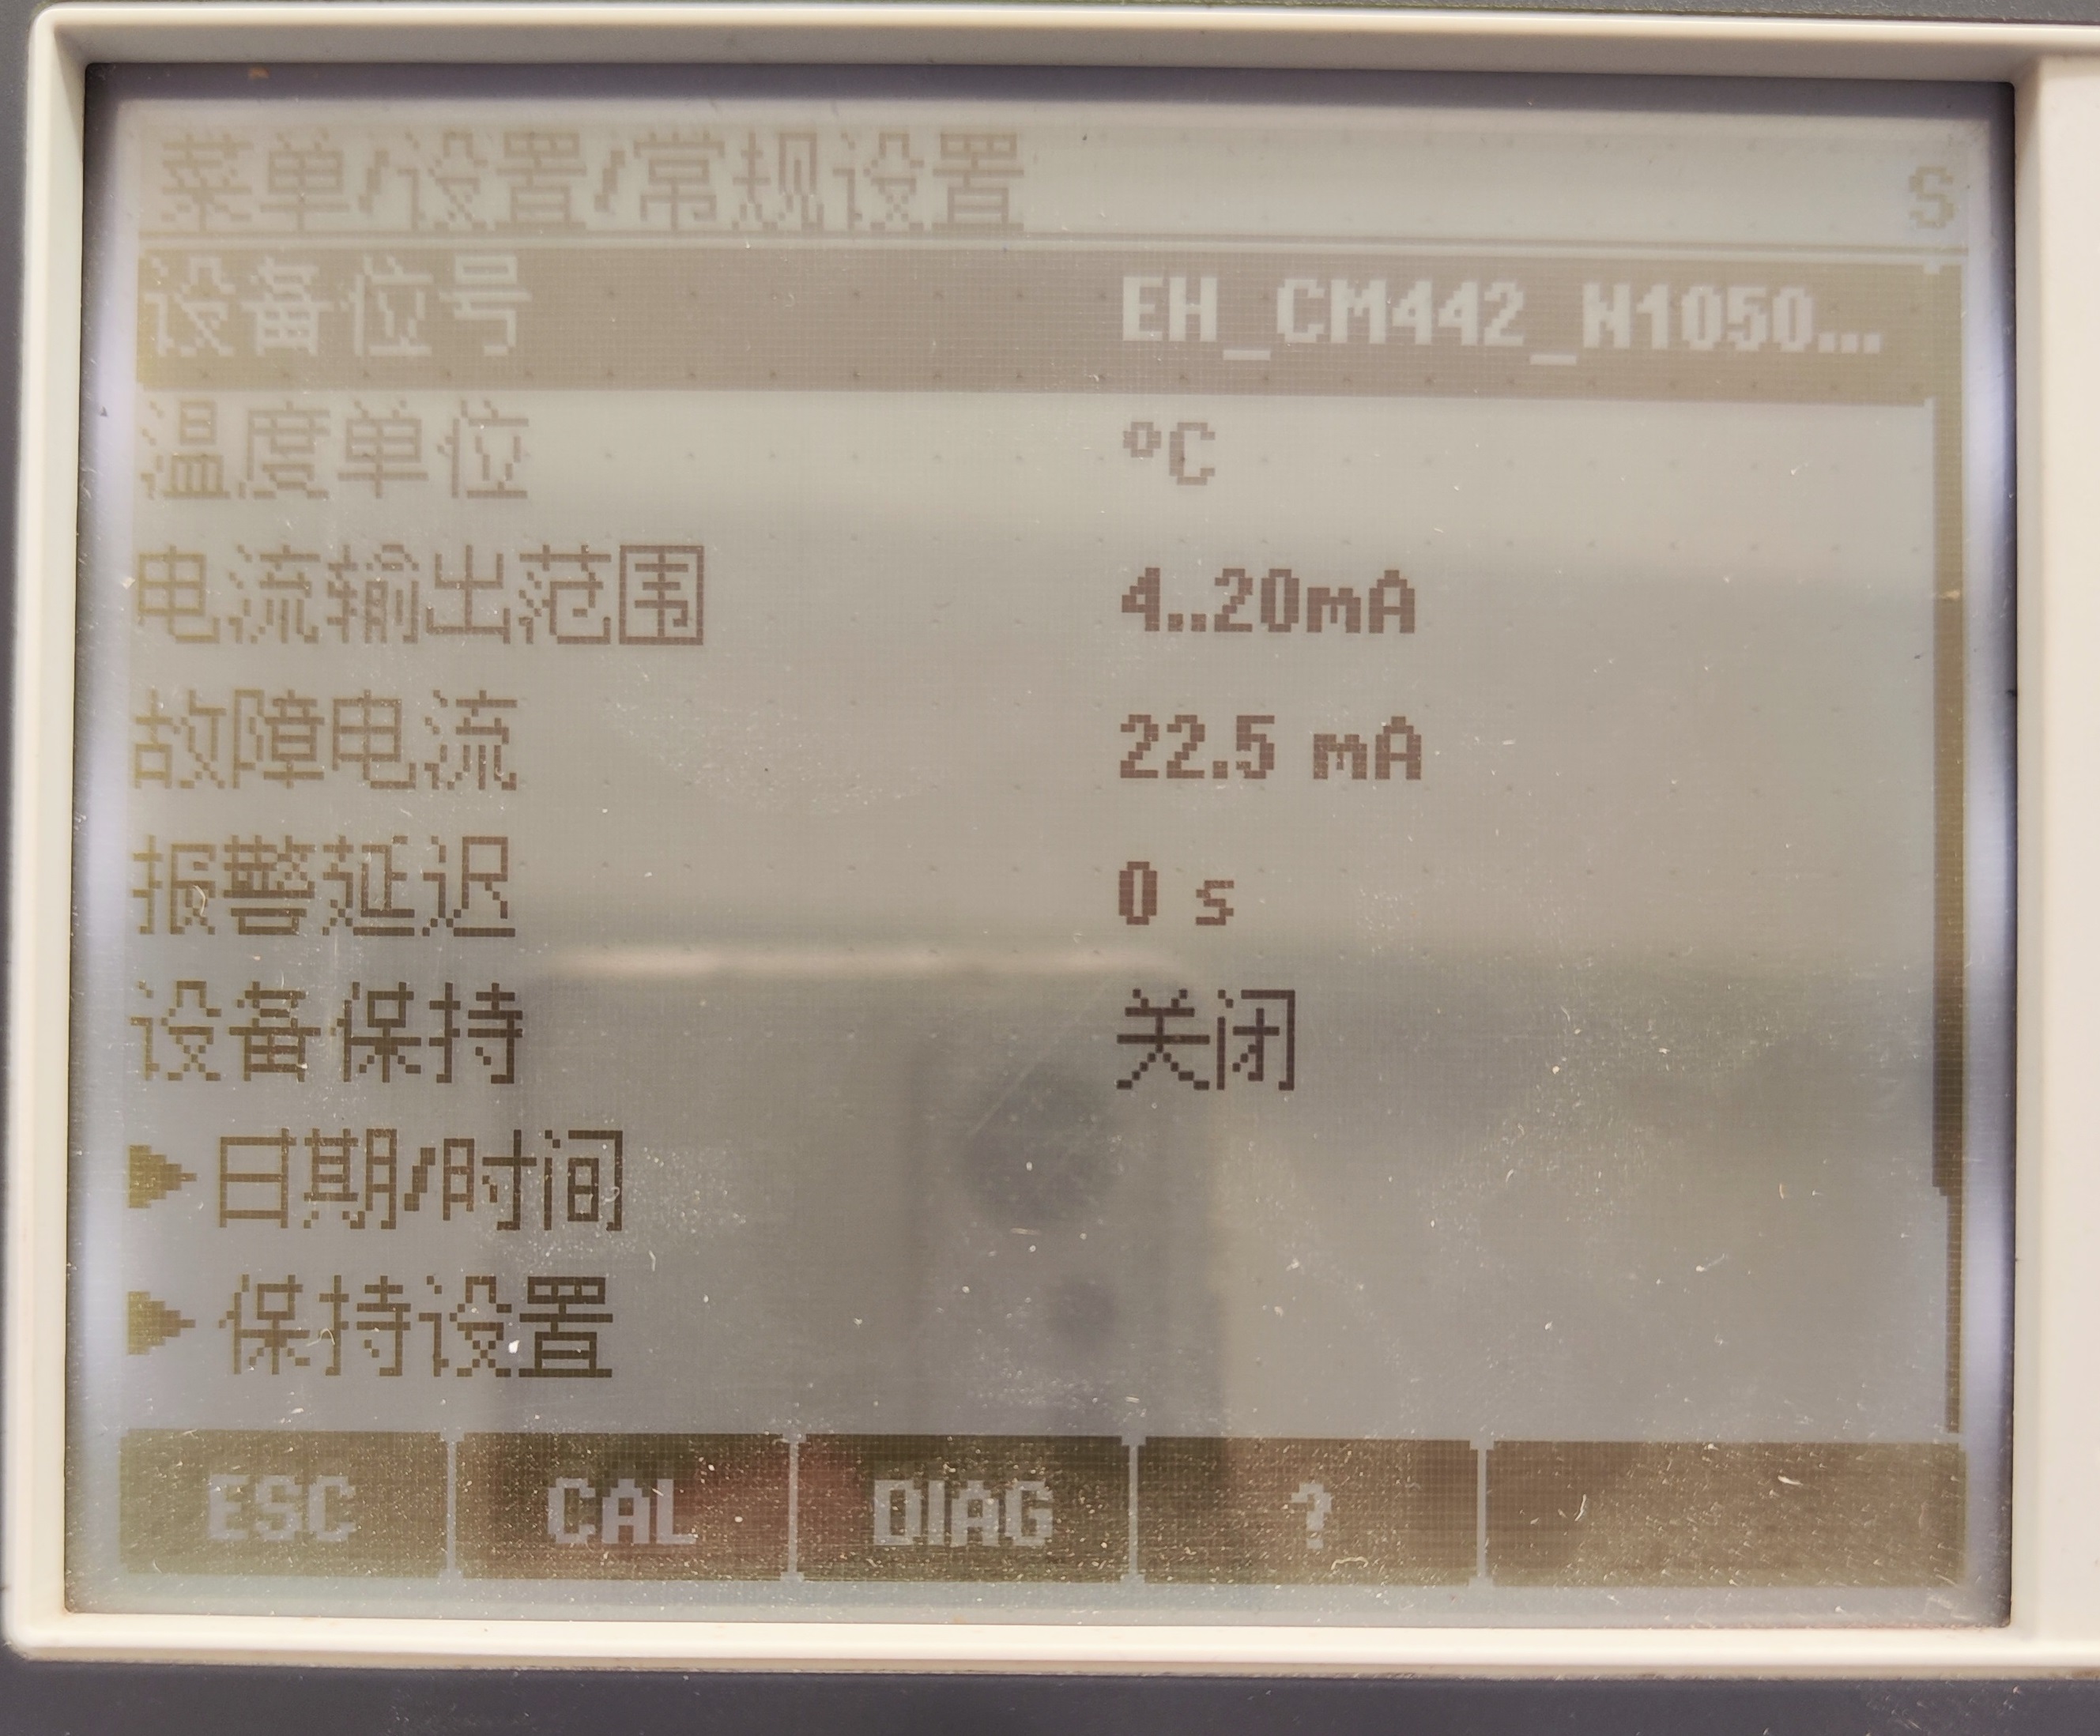
En la interfaz del menú, busque Configuración general. Los sensores digitales incorporan componentes electrónicos internos que almacenan parámetros de calibración y otra información. Una vez que el sensor se conecta correctamente al transmisor, los parámetros del sensor se transmiten automáticamente de inmediato al transmisor para calcular el valor de medición actual. El usuario puede seleccionar según sus necesidades la unidad de temperatura y el rango de salida de corriente.
V. Configuración de la salida de corriente
5.1 Acceder a la interfaz de salida
En la interfaz del menú, busque Configuración y presione la tecla central de la perilla para acceder a la interfaz de salida.

5.2 Seleccionar el canal de salida de corriente
En la interfaz se muestran Salida de corriente 1:1 y Salida de corriente 1:2; presione la tecla central para acceder a cada una respectivamente.

5.3 Configurar la fuente de datos
Con la perilla, seleccione Fuente de datos y presione la tecla central del instrumento.

Como se muestra en la figura siguiente, se ha seleccionado Electrodo de vidrio. El usuario puede seleccionar la fuente de datos según los diferentes sensores.

5.4 Seleccionar el valor de medición
Después de seleccionar la fuente de datos, en la interfaz de visualización aparecerá el valor de medición; el usuario selecciona el valor de medición requerido según sus necesidades. La configuración de Salida de corriente 1:2 es básicamente igual que la de Salida de corriente 1:1, por lo que se pueden seguir los pasos de la salida de corriente 1:1 para configurarla.

VI. Resumen de parámetros clave
| Elemento | Parámetro/Descripción |
|---|---|
| Tensión de alimentación | 220 V AC |
| Tipo de electrodo | Electrodo de vidrio CPS (digital) |
| Modelo de cable | Cable de electrodo digital CYK10 |
| Colores de cableado | 87 marrón, 88 blanco, 97 verde, 98 amarillo |
| Configuración de idioma | Se puede modificar manualmente; no es necesario especificarlo al comprar |
| Salida de corriente | Salida de corriente 1:1 y 1:2, configurables de forma independiente |
Mediante los pasos anteriores se puede completar la configuración básica del transmisor CM442. Si se requiere un ajuste adicional, consulte el manual de operación detallado.